As most SharePoint developers can attest to, Workflows in older versions of SP used to be tedious and slow at best. Microsoft has acknowledged these lingering concerns, and SharePoint 2013 has a lot of exciting improvements to showcase. Let’s take a look at what our SharePoint developers are most excited about with Workflows.
What’s New in SharePoint 2013?
SharePoint 2013 embraces innovative features specifically for Workflow including fully declarative authoring, REST and Service Bus messaging, elastic scalability, and managed service reliability. SharePoint 2013 Workflow is using a new service as Workflow Manager which will be a vital service in an Enterprise to accommodate business processes. Essentially, this means Workflows not only perform quickly, but they also offer scalability. 
New features include:
- Workflow development that uses a Visio 2013 add-in
- New Dictionary type
- More actions for creating a task and starting a task process
- Coordination actions that let you start a workflow built on the SharePoint 2010 Workflow platform from a workflow built on the SharePoint 2013 Workflow platform
- No-code web service calls from within a workflow
- Workflow building blocks such as Stage, Loop, and App Step
Part 1- Installation and Configuration
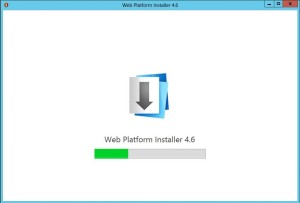
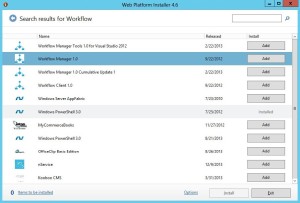
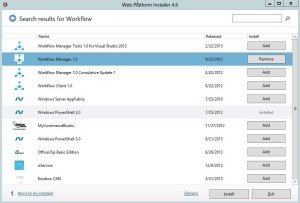
Download Microsoft Web Platform Installer 4.6
- Select “Install”
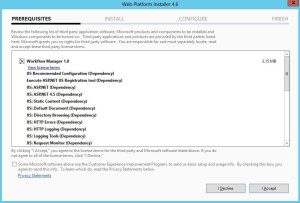
- Click “I accept” to accept the option
- Click “Continue” to proceed to the next screen
- Click “Finish” and wait for the installation to complete
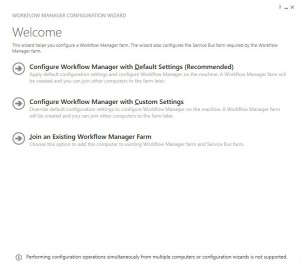
- Launch the Workflow configuration wizard
- Select “Configure Workflow Manager with Default Settings”
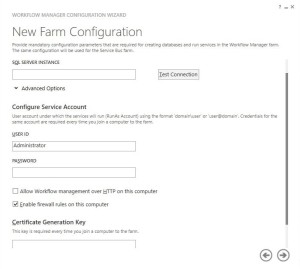
In the next screen, add the SQL server and click Test Connection. Database names will be set to default names here for the Workflow, instance and resource management databases. Clicking on the Test Connection will ensure that the database names are not already in use. For the custom database names, Click “Configure Workflow Manager with Custom Settings”
- Because this is a development environment, check the “Allow Workflow management over HTTP on this computer”. Note: It is not recommended per TechNet to allow workflow management over HTTP in a Production environment
- Click the forward arrow to move to the next screen
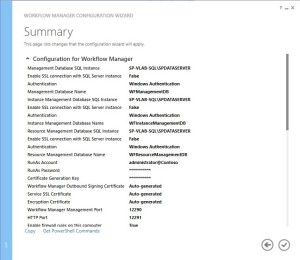
- Review the summary and ensure you selected what was required and click the \/ to install Workflow Manager 1.0
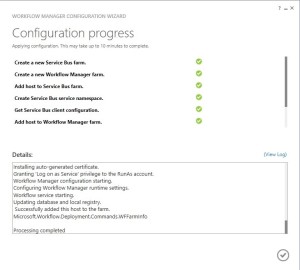
- Click \/ to finish the installation with all the green circles
- Now we need to register the Workflow for our site.
- Open “SharePoint Management Shell” as “administrator”, run the following commands:
Register-SPWorkflowService –SPSite http://intranet.usilabs.com –WorkflowHostUri
http://sp-usi-labs:12291 -AllowOauthHttp
After this command runs successfully, we will be ready to develop SharePoint 2013 Workflows.
Part 2: Create SharePoint Designer 2013 Workflow
- Open “SharePoint Designer 2013”
- Click “Open Site”
- For site name, type http://intranet.usilabs.com
- Click “Open”
- Click “Open” again
- In the ribbon, select “Workflows”
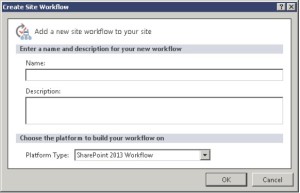
- In the ribbon, click “Site Workflow”, you should see the “SharePoint 2013 Workflow” option:
Summary
Important Reminder: The SharePoint 2013 Workflow platform is only available to you, subsequently, you need to download and install the new Workflow Manager Service and configure it to communicate with your SharePoint Server 2013 farm as detailed in Part 1.
SharePoint Server 2010 Workflow will continue to work in SharePoint Server 2013. Formerly, with SharePoint Server 2010, the Workflow engine installed automatically with the installation of product. This still holds true in SharePoint Server 2013. If you just install SharePoint Server 2013 and do not install and configure Workflow, then you will have almost the same experience building Workflows as you did in SharePoint Server 2010.
Need additional resources? Check out this TechNet Workflow Manager article. What do you think of the new improvements Microsoft has invested in Workflows for SharePoint 2013? Feel free to comment below!

